概述
虽然springboot及springcloud的框架已经很流行了,但是他们也都是基于spring framework的框架衍生而来。如果你想更好的使用springboot及cloud,学习spring framework框架也是最好的途径之一。构建一个原生的spring mvc的框架就可以在一个很干净(没有boot或cloud体系源码干扰)的环境中学习spring框架。
其中会有一些配置涉及maven等基础知识,请自行补足。
框架要求
如果你使用过springboot,测试运行及打包运行都会很方便。但是spring mvc就需要自行完成这些工作:
- 编写完部分代码后要求能在idea中启动并测试
- 打包成war后进行测试
框架中间件的相关版本:
- spring framework 5.3.23
- javax.servet.api 4.01
- Jetty 10.0.12
- Tomcat 8.5.82
使用Annotation配置
1、实现WebApplicationInitializer,这是整个web程序的入口类
import org.springframework.web.WebApplicationInitializer;
import org.springframework.web.context.ContextLoaderListener;
import org.springframework.web.context.support.AnnotationConfigWebApplicationContext;
import org.springframework.web.servlet.DispatcherServlet;

import javax.servlet.ServletException;
import javax.servlet.ServletRegistration;

public class CompanyApplication implements WebApplicationInitializer {

    @Override
    public void onStartup(javax.servlet.ServletContext servletContext) throws ServletException {
        AnnotationConfigWebApplicationContext context = new AnnotationConfigWebApplicationContext();
        context.scan(CompanyApplication.class.getPackageName());

        servletContext.addListener(new ContextLoaderListener(context));

        DispatcherServlet servlet = new DispatcherServlet(context);
        ServletRegistration.Dynamic registration = servletContext.addServlet("mvc",servlet);
        registration.setLoadOnStartup(1);
        registration.addMapping("/company/*");
    }
}
2、创建WebMvcConfigurer类,用于web的相关资源或json解析的一些定义
import java.nio.charset.Charset;
import java.util.Arrays;
import java.util.List;

@EnableWebMvc
@Configuration
public class WebConfig implements WebMvcConfigurer {
    @Autowired
    private ApplicationContext context;

    /**
     * 使用FastJson2来完成对JSON的解析
     * @param converters
     */
    @Override
    public void configureMessageConverters(List<HttpMessageConverter<?>> converters) {
        FastJsonHttpMessageConverter converter = new FastJsonHttpMessageConverter();
        FastJsonConfig config = new FastJsonConfig();
        converter.setFastJsonConfig(config);
        converter.setDefaultCharset(Charset.forName("UTF-8"));
        converter.setSupportedMediaTypes(Arrays.asList(MediaType.APPLICATION_JSON));
        converters.add(converter);
    }
}
在Idea中直接启动spring framework项目
一定要注意,Jetty的版本只能使用11以下。由于Jetty11以上的javax.servet已经更换成为了jakarta.servlet,而spring framework 5.2.23目前只兼容javax.servlet。
<plugin>
<groupId>org.eclipse.jetty</groupId>
<artifactId>jetty-maven-plugin</artifactId>
<version>10.0.12</version>
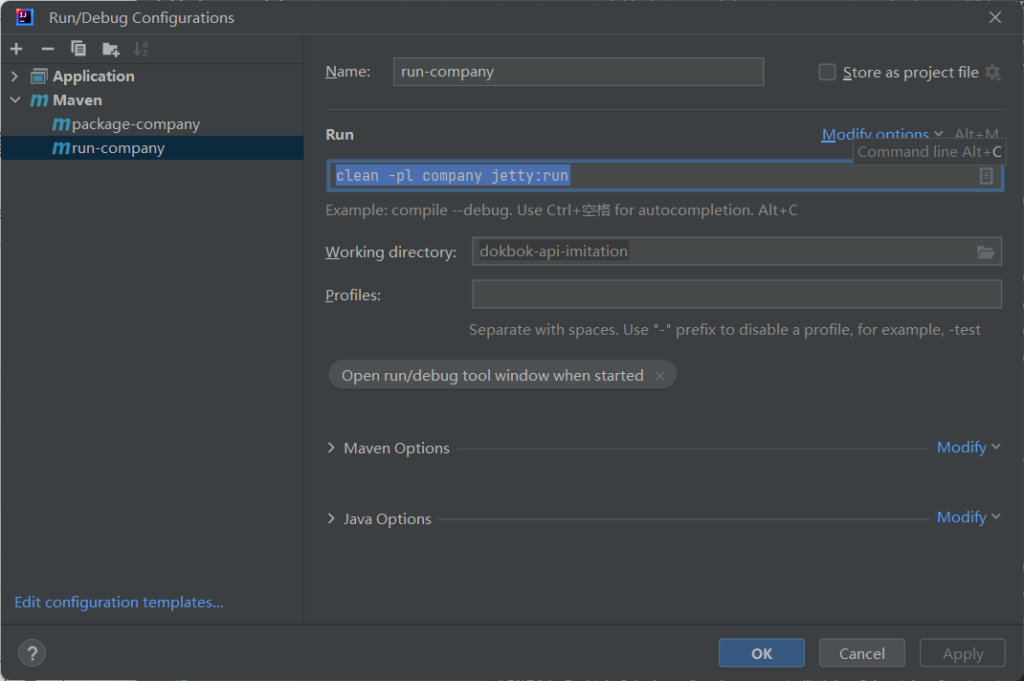
</plugin>原始命令
mvn clean -pl company jetty:run在Idea中配置
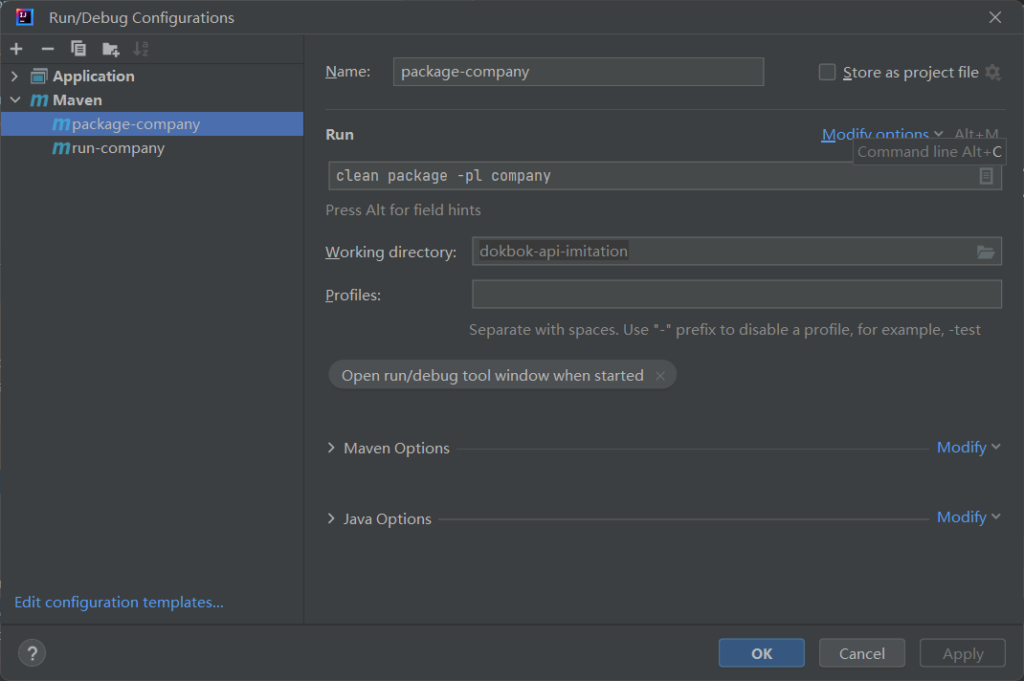
打包成WAR包并使用Tomcat启动
一定要注意,Tomcat的版本只能使用8以下。由于Tomcat 8以上的javax.servet已经更换成为了jakarta.servlet,而spring framework 5.2.23目前只兼容javax.servlet。
    <build>
        <plugins>
            <plugin>
                <groupId>org.apache.maven.plugins</groupId>
                <artifactId>maven-compiler-plugin</artifactId>
                <configuration>
                    <source>18</source>
                    <target>18</target>
                </configuration>
            </plugin>
            <plugin>
                <groupId>org.apache.maven.plugins</groupId>
                <artifactId>maven-war-plugin</artifactId>
                <configuration>
                    <failOnMissingWebXml>false</failOnMissingWebXml>
                    <warName>company</warName>
                    <warSourceDirectory>src/main/webapp</warSourceDirectory>
                    <archive>
                        <manifest>
                            <mainClass>com.dokbok.apiimitation.company.CompanyApplication</mainClass>
                            <addClasspath>true</addClasspath>
                        </manifest>
                    </archive>
                </configuration>
            </plugin>
        </plugins>
    </build>
原始命令
clean package -pl company在idea中配置